Thursday, 2 October 2014

Gardening with Giraffe's

Still here awaiting baby's arrival.
I'm not in any rush...but it would be nice to know when they plan to make their arrival.

I've been super uncomfortable the past couple of days, and yesterday I was up at 2am and failed to get back to sleep.  So yesterday was spent on the sofa, being lazy (I've been told I'm allowed to be a bit lazy!), watching the House box set (which I am thoroughly enjoying!), and doing a little bit of crochet on one of my new projects. 

Here is a sneaky glimpse of my new project...
Crochet project
I am hoping it will be ready for autumn/winter...but no doubt as I've started a project I would like to finish, family life is likely to get in the way.  I fear I may have forgotten about the demands of looking after a baby...and I have a toddler to contend with too now!

We have had at least 2 weekends in a row of being at home, which has meant we have been able to get on with some much needed chores.  The garden being the most important in order to get it wrapped up ready for autumn/winter.  We have done a lot of pruning/weeding in the front and back garden.  There's still plenty of jobs to do, but at least we are looking tidier for a while.
My little man has been very helpful...

These little critters have been not so helpful...(can you spot him?!)!
 A rather large black legged one scuttled across our new rug under the sofa the other day before the husband could jump to his feet and dispose of it...he is lurking sure to come out again soon!

We have bought a new rug...something to warm up the lounge, and to offer us a comfier space to play with our little man and our new arrival. It has made the lounge look much bigger and is so comfy/warm and our little man is enjoying rolling around on it already...a big hit!

So on to some crafting.  
 
I mentioned in my last post that I had done some more crafting for a baby girl expected to arrive in December.  The couple had recently been on holiday and had fed some giraffes...so I thought I would embark on a giraffe taggie for their baby.  There are lots of patterns etc available if you google giraffe taggie...I decided to go off pattern and just wing it.
 
I picked my fabric, and then drew my giraffe template...
Giraffe Taggie
I then cut out 2x giraffe pieces (material doubled over so they would match!), and put right sides together...
Giraffe Taggie
 I chose my ribbon taggies...my ribbon selection is quite limited, and this pink/yellow ribbon fitted best.  I would have done different colours if I had some good coordinating ribbon.
So the tag ribbons were pinned in place, and then I stitched around the giraffe, making sure not to stitch the tags down when sewing down the opposite side of the neck!
Giraffe Taggie

I left a small hole for turning, and then turned inside out and stuffed.
I have sewn closed things before, but I thought I would try and learn how to do it professionally to get the "seamless" look.  I found this tutorial for invisible closing seam...I am informed this may be a ladder stitch?!?  I tried...and it worked! 
Look at this.
Invisible seam
Very professional even if I do say so myself! I am pleased with it as my first proper attempt.

So here is finished giraffe taggie...

I am pleased with it and it has been well received.

I am going to try and buy some nice boy fabric to make some stuff for my men...they are overdue a make!

Speak to you soon.

Love from me and my little man x


Monday, 29 September 2014

Baby Lola!

An excuse to make some girly things at last!

My friend whom I had made skinny bear for has had a baby girl!  Lola Olive!  Brilliant news to receive on a morning, and pleased to hear mum and baby are both doing so well.  I can't wait to meet her, but until my growing bump decides to arrive, I cannot make plans to visit and cuddle her as they are about 2hrs away.

So time to set about crafting for a baby girl!  I wanted something that I could personalise for her and as I was trawling through my fabric stash, I found some lovely colours that were begging to be used.
I did consider leaving the green out, but I thought it was a nice bright addition. 
 They are quite bright, busy florals, and I wasn't sure how to personalise them...fabric or felt applique?! And what colour for the letters to stand out enough?!  I personally prefer using felt for appliques as it tends to look tidier and amongst the materials I had I picked  a light pink felt which seemed to look okay against all of the fabrics and thought I could do a contrasting running stitch to bring out the letters.  A cream bias binding was chosen for the top.

Firstly to cut out all the flags or "bunts".  I thought 6 would be big enough....4 for her name and one either side.  This way it could hang above her cot for example without being too long, and also I wanted her name central without having a "swag" separating the letters in her name.  Once all cut, to start the personalisation...

Not looking too shabby!
Now to pin and stitch....

The stage I then love... to turn them all inside out and iron them to get them looking smart ready for the binding to be sewn on.

 Completed!
Now the bit I'm not so good at...photographing the finished work!  
I hung it in the conservatory so we could get an idea of it hanging up and the length, but it turned out such a dull picture...probably as it looks so bright and sunny outside!
 So the only other option was to lay on the cream rug and take a photo from above...
Well that's the best of a bad bunch...
I couldn't hang around taking photo's all day...this bunting had to be sent to mum and baby!  (well...and the dad...but dad's don't really appreciate pretty flags...do they?!)

I have heard that it has been well received so I am happy it is another project completed.

I have been making more girly makes for another friend expecting a baby girl in December...I'll write about that one soon.
I am over 39 weeks pregnant now, hospital bag is packed and I am enjoying the calm before the storm before my baby decides to make his arrival.
Bye for now.
Love from me and my little man x

Wednesday, 10 September 2014

Skinny Bear

One of my lovely University friends is also expecting a baby, about 2 weeks before me!  As part of a gift, I thought I would put my hand at crocheting something for the baby so that it would be unique.  She doesn't know the sex of the baby which, although exciting, made colour choice a bit more difficult.  I decided to opt for red with a navy stripe for the teddy's tee shirt in the end as I thought that was acceptably unisex!

This is the pattern I followed from Crafty Rah Rah.  I loved the teddy when I saw him so thought I would try. 

Well the head and the ears worked up well - I used Sirdar baby bamboo wool.  The legs also seemed okay, although when attached looked a wee bit wonky and not quite right!  The body I struggled with!...I did it twice and it ended up as big as a hat!  I was convinced I was interpreting the pattern right, but it was so disheartening I admit I lost my mojo.  I drafted in my sister to help with the body and arms and she helped explain the pattern instructions to me.

With all pieces made, I lightly stuffed, and sewed on all appendages!  Here he is...

 Sorry for the poor photo but you get the idea...can you see his legs look wonky...maybe one bigger than the other?!


He was well received and has now been aptly named "Skinny Bear"...hmmm...maybe I did stuff him too lightly!!!  The wonkiness adds individuality...and I explained that when he's being shook (which babies do to their teddies) he looks much better all wobbly a little bit like Mr Bean's teddy!  I did also explain that this has not been tested for safety...so they can't sue me if his legs/arms come off!!!!

I may even attempt another...at some point....

Love from me and my little man x

Monday, 4 August 2014

Pew restoration project!

A slightly different project this week.  My in-laws had their kitchen re-vamped a while ago now, and they had relegated a dark stained church pew to the garage. It desperately needed a new home. We thought we wouldn't have room for it at our house, but with a bit of re-thinking and measuring we found it may fit in.

Next came the challenge of transporting it from South Wales to Southampton! That was probably the biggest challenge as it didn't quite fit in the cars safely...and we kept umming and ahhing about paying a courier to deliver it.  Then when we forcibly had to upgrade our car this summer, and choosing an estate for our growing family, we found that we were in business.  The pew zipped its way down the m4/m3 and ended up in our garage ready for an upgrade!

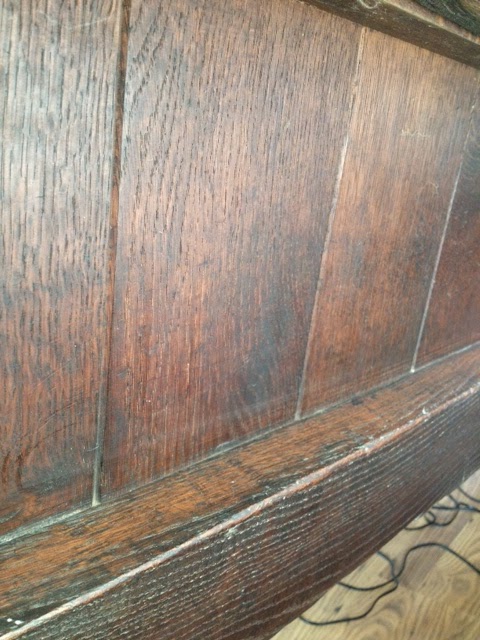
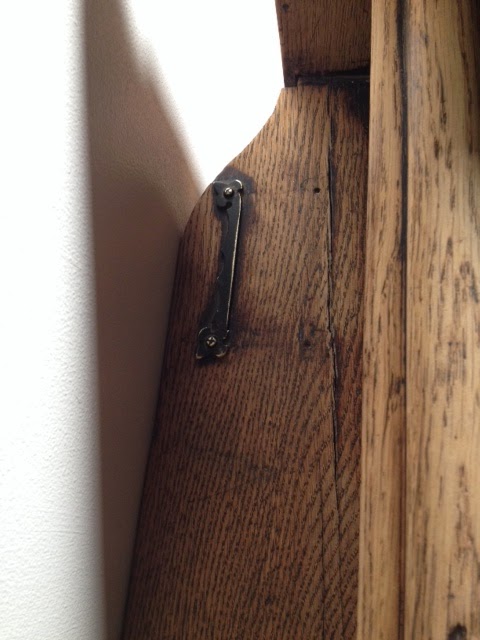
I wish I had taken a proper "before" photo as it has undergone quite a transformation.  Below are a few pictures of before... My husband set about many long hours sanding back the dark stain to find a gorgeous Oak hiding.  We wonder why anyone would stain such a nice wood...but then that may be due to it's purpose/fashion at the time.  We don't know the history of the pew...but it's got a few gnarly and bashed bits, it's got the numerals VII engraved in a few places (we thought maybe it was intended for row 7 in the church maybe..?!) and a little metal bracket-y thing on the back shelf.  I'm sure it's had many a person sit on it through it's life.

Dark Stain


VII


 So here's a picture of it in our garage undergoing sanding...
Sanding

Sanding

Then it needed a good wipe down to clean it up.  We had help to move it up to the house as it was so heavy and so a sword fight ensued between my little man and his Grampy with the Pew providing a safe barrier between them!
Cleaning up
And then the finished item in place...


I think it looks brilliant!  We are not sure whether to put a clear wax on it to finish it off, or to leave it as it is.  We will have a think.  I have the project of getting some nice wicker baskets to fit underneath to house our shoes, and also to find a fabric to re-upholster the foam cushion to fit along it's seat.  I am at a loss currently as to which fabric to pick...any suggestions gratefully received.

For the time being...we have already perched a few bums on the seat...


I'll keep you posted with any additions to the pew restoration project!

Love from me and my little man x

Tuesday, 29 July 2014

Baby blanket

At last I can finally say that I have finished a blanket!!  Usually the routine goes that I make a start and then decide I don't like the colours, decide it's way too big and generally get bored of crocheting along.  But this...I have finished! The things that got me through this wooly project were a) knowing that it was going to be a pram blanket for my pending arrival, b) using 3x strands of wool meaning that it is a chunky, fast growing blanket, and c) loving the colour combination.  I think the saving grace was that it was intended to be small, so it wasn't such a big commitment in my head. 

I enjoyed making this one, and it actually gave me a valid chance to put my feet up and chill out for  a bit (whilst still being under the guise of being "productive"!!).

I am an avid fan of Pintrest as there is so much inspiration to trawl through.  This is where I got my original pattern from.  I think this blanket is funky and different.  Blanket Pattern here.


Here is my project in pictures...

Making a start whilst the rhubarb and raspberry crumble is cooking in the oven...

The start..

Growing quickly...just like me tummy in the picture...

Growing...

Getting some crocheting time whilst sitting in the sunny garden with my mum and sister...it's growing...
Crochet in the garden...

It was at this point that I had those feelings of doubt...the wool kept un-ravelling, remaining balls getting smaller and smaller and  I did the terrible thing of not keeping the labels!  Would I be able to match up the colours? How much more would I need?!  So on return home, I set out to our local (as in 2mins walk down the road) wool shop Knit Stitch N Craft  and me and the kind lady set about matching colours.  I managed to find the beige and the green (last balls hidden on the shelf!) and the blue we got a very very close match that would suffice...and indeed you cannot tell the change in the blanket.  The visit to that shop gave me more motivation to carry on and taught me one of the big lessons of always keeping your labels!!!

 Loving the chunkiness of this...I used an 8.0mm hook by the way...
ChunkyChunky

Chunky

 And here it is...Ta-Dah!  Hanging over the cot ready for baby to arrive...

Finished baby blanket!

 I considered a border...but then decided that it looked funky and finished without one.  I love the colours...I was dubious about adding the beige wool...but actually it helps to tone down the blue/green.

I am now onto my next hooky project....

Love from me and my little man x


Friday, 4 July 2014

Upcycling and Crayola Art

It's been a while...about 6months in all, that I've shied away from blogging.  The time seems to have flown and I've been busy crafting something a little different...
Baby 2

...and I'm now 27 weeks pregnant!

The pregnancy has been great on the whole, and I have only really struggled with restless legs at night - apart from that no other physical complaints which is good.  There have been some potential concerns with the baby, but so far it's growing, kicking me a lot, and the medics are keeping an eye on us, so hopefully all will be okay eventually.

My little man understands a lot more than I give him credit for, and we have turned a corner of him thinking it was being a "naughty baby as it's kicking mummy", to lots of hugs, talking to the bump, and plastering the baby in Thomas the tank engine stickers!  The future arrival of a new addition to the family has led to some great developments for him - the transition into a Big boys bed, and a Big boys bedroom!  This has all gone down very well and he has not been bothered by venturing into his old room.

I will take some photo's to show you his new room in time...but I have completed a couple of projects for him.

1) Up cycling furniture.
Storage has always been limited for clothes, and a new chest of drawers was definitely needed.  Coincidentally my mum was getting rid of an old dresser she had.  I think the story is that she had it when she was 18 and it has taken on different colours/uses since then!

This is it in it's original, dated glory...

Dated dresser
 I hired my husband to do the hard job of sanding it down.  The varnish was on so thick it took a good while.  He started when it was a bit chilly, so he waited until warmer weather to finish it off for me.

Sanding

Sanded
Once sanded (I forgot to get a picture of it when it was naked!), I set about to painting.  I did two coats of undercoat primer, and two coats of eggshell paint.  It didn't take too long to paint, but I had to be careful of dribbles.
..getting there...

It then sat knobless for a while why I debated over which knobs to choose.  I wanted something that would be boyish, practical, pretty, not too expensive and something that he wouldn't grow out of.  I ended up buying red, green, and blue ceramic knobs which I think work well for a boys room.  These can always be changed in the future so the dresser can be re-purposed when needed.

Here is my "Ta-Dah" moment!

Ta-Dah
 I am really pleased wit the way it's turned out.  We still had a conversation about storage crisis...so we ended up buying another unit from IKEA, but I think eventually it will get the same treatment and I think they'll look pretty good next to each other.

Future project

There's lots of little bits to finish off in the room which will come in time, but at the moment, he's enjoying sleeping in his new bed in his new room.

I have done some fun crafting for his room too...

2) Crayola Art
So i've absolutely loved the crayola art ideas that have been coming up on Pintrest...and it just seemed too much fun to pass by!

I had a spare canvas, so I set about buying a good range of crayons.  Now this was probably the hardest challenge.  Every shop I looked in did the smaller packs, but I didn't want repetitive colours, I wanted a whole range.  Crayola in shops these days includes all sorts of fandangled new pens/pencils/crayons etc.  I just wanted traditional!  In the end John Lewis came up scrubs and I bought....


I went through and picked out all the dull colours (blacks, greys, browns etc.) and then sorted them into colour groups and arranged them until I was happy, and was certain they'd fit.  I then set about super gluing them to the canvas.
Crayola Art
Crayola Art

 This was my favourite colour range.


I was going to stick my little man's name accross the bottom and then peel off once the wax had dribbled...but I actually like the black W I stuck on in the corner, and decided to leave it there.  Then came a hair dryer...and a lot of fun....
Crayola Art
 They took a while to get started, but then once they started running, they were away!
Crayola Art


It's not hanging on the wall yet but....

....Ta-Dah!
Ta Dah Crayola Art

I think it's pretty cool, something just for my wee man...and it was super fun project to make!

That's all for now.  But am sure will write again soon.

Love from me and my little man x